
How to Change + Compress an Image in PowerPoint
You’ve got a template for your PowerPoint, but you’ve changed your mind on what images you’d like to use. No big deal! No matter if the image is the background or placed into a shape, it takes just a few steps to update your image and make it look and fit right. And, before you send off this slide deck to your colleagues, investors, or board members, be sure to compress your images so you don’t max out their Gmail storage.
This post covers inserting and changing a picture in a template and changing a picture within a shape, and how to compress an image (it’s the same for both types of placed images).
Changing + Compressing a Picture in PowerPoint
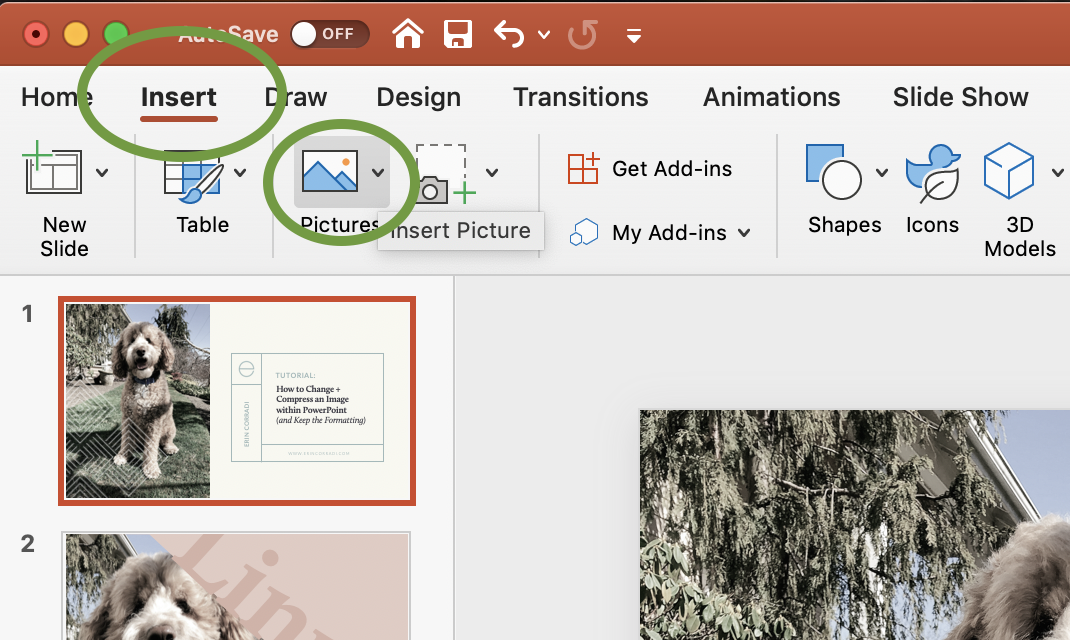
Step one: Click on the icon to select the image you’d like to use.
(If you’re not using a template, scroll down to the secondary step one.)
Navigate through and find the file you’d like to use.
Select “Insert.”
Keep the image selected for step two.

Step Two: Fit Your image.
If you inserted your image and it looks skewed, click “Crop” and “Fit”. Now you can go down to step three to resize your image.
ALTERNATE Option (if not in a template): Select “Insert”.
Next, click the small arrow to the right of the picture icon.
Select the location of where your image is (online, computer, etc.) from the dropdown menu.
Find the image you want to use and select “Insert.”
Keep the image selected for the next step.

Step Three: Click on the crop button.
Now you can resize your image within the space. Remember to only use the corner dots when resizing to keep the proportions in tact.
Keep the image selected for the next step.
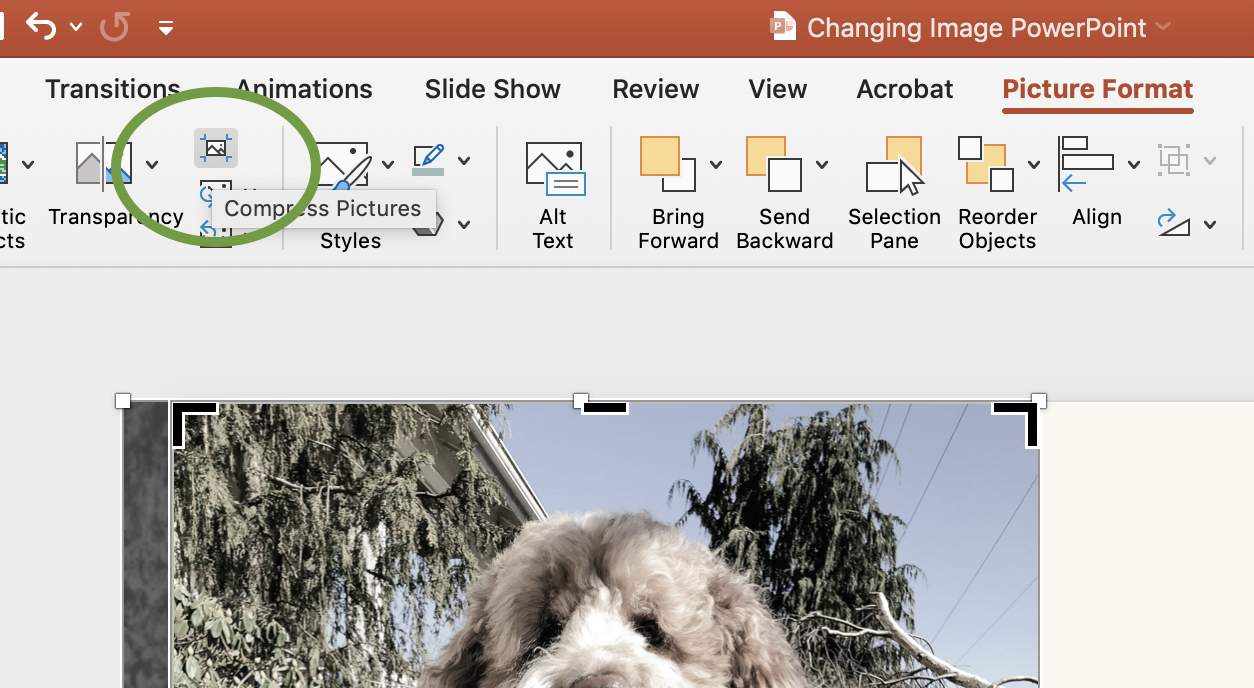
Step Four: Select the “Compress” Button.
It’s the top button of the three in that column.
Depending on what this powerpoint is used for and your method of transferring it, use the “Picture Quality” dropdown to select the amount of compression.
Also, if your image is cropped exactly how you want it forever, keep the “delete all cropped areas of pictures” selected.
Finally, if you want to compress all the images in your PowerPoint, keep the top radio button selected to “all pictures in this file”.
Don’t forget to hit “save”!
Changing + Compressing a Picture within a Shape in PowerPoint
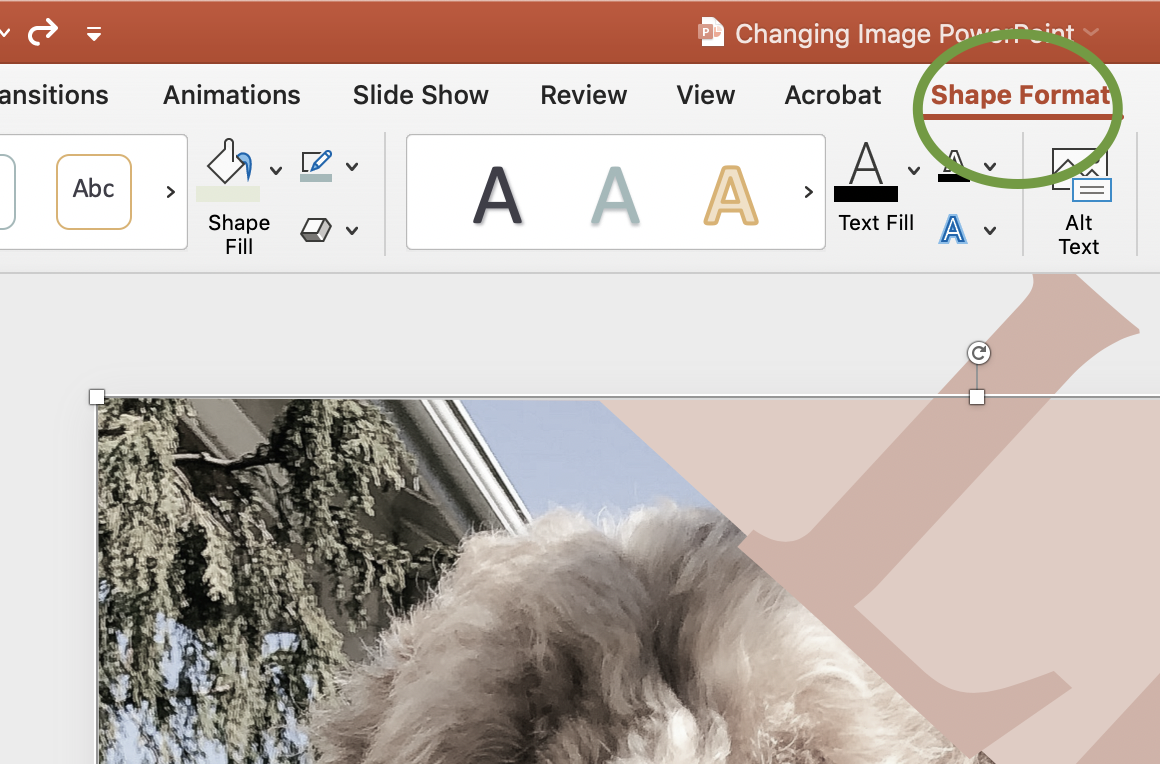
Step One: Click on the image you want to change.
Once the image is selected, the “Shape Format” toolbar will show. Click on that to get to the next step.
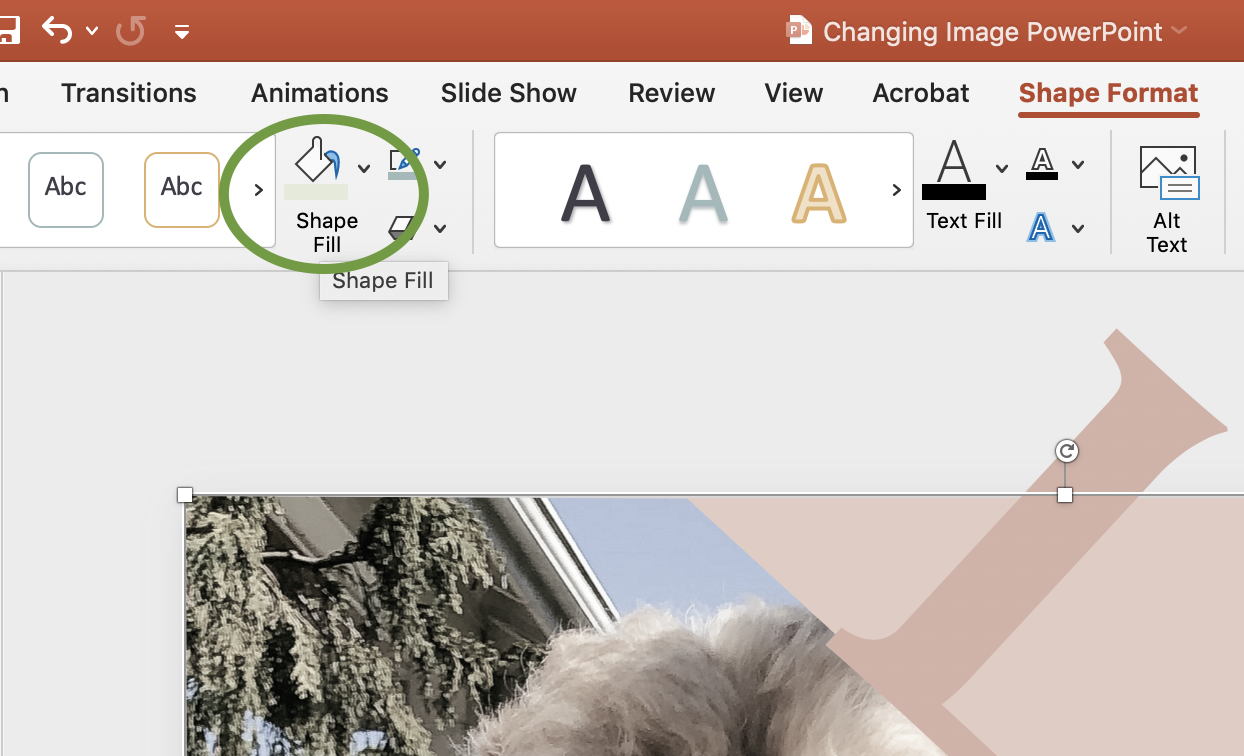
Step two: Select “Shape Fill”.
Click the small arrow to the right of the “Shape Fill” icon.
Select “Picture” and navigate to find your photo.
Find the image you want to use and select “Insert.”
You’re image might look wonky. Don’t panic! Keep the image selected for the next step.

Step three: Select “Picture Format”.
Click the small arrow to the right of the “Crop” icon.
Select “Fit”.
Now you can resize your image to fit into the shape. Remember to only use the corner dots when resizing to keep the proportions in tact.
Now follow the step four above to compress your image(s).
Don’t forget to save!
Tutorial Request
Tired of Googling and scrolling through forums?
Make a tutorial request and sign up for my email list to get alerts when new how-tos are added.