
How to Package + Share an InDesign File
The book, brochure, guide — which you’ve created in Adobe InDesign and poured your heart and soul into — is ready for the next stage. But how are you going to get all your hard work to your copy editor, colleague, publisher? The key is to package up your project so that all the images, fonts, and linked files aren’t missing when the next person opens it up. Let’s walk through how to package your InDesign file and send it to others.
P.S. Adobe InDesign is one of my recommended business tools for anyone who needs to create text-based content, such as ebooks, brochures, or downloadable pdfs.
Packaging an InDesign File
Step one: Save your file.
(If your file isn’t open already, open it.)
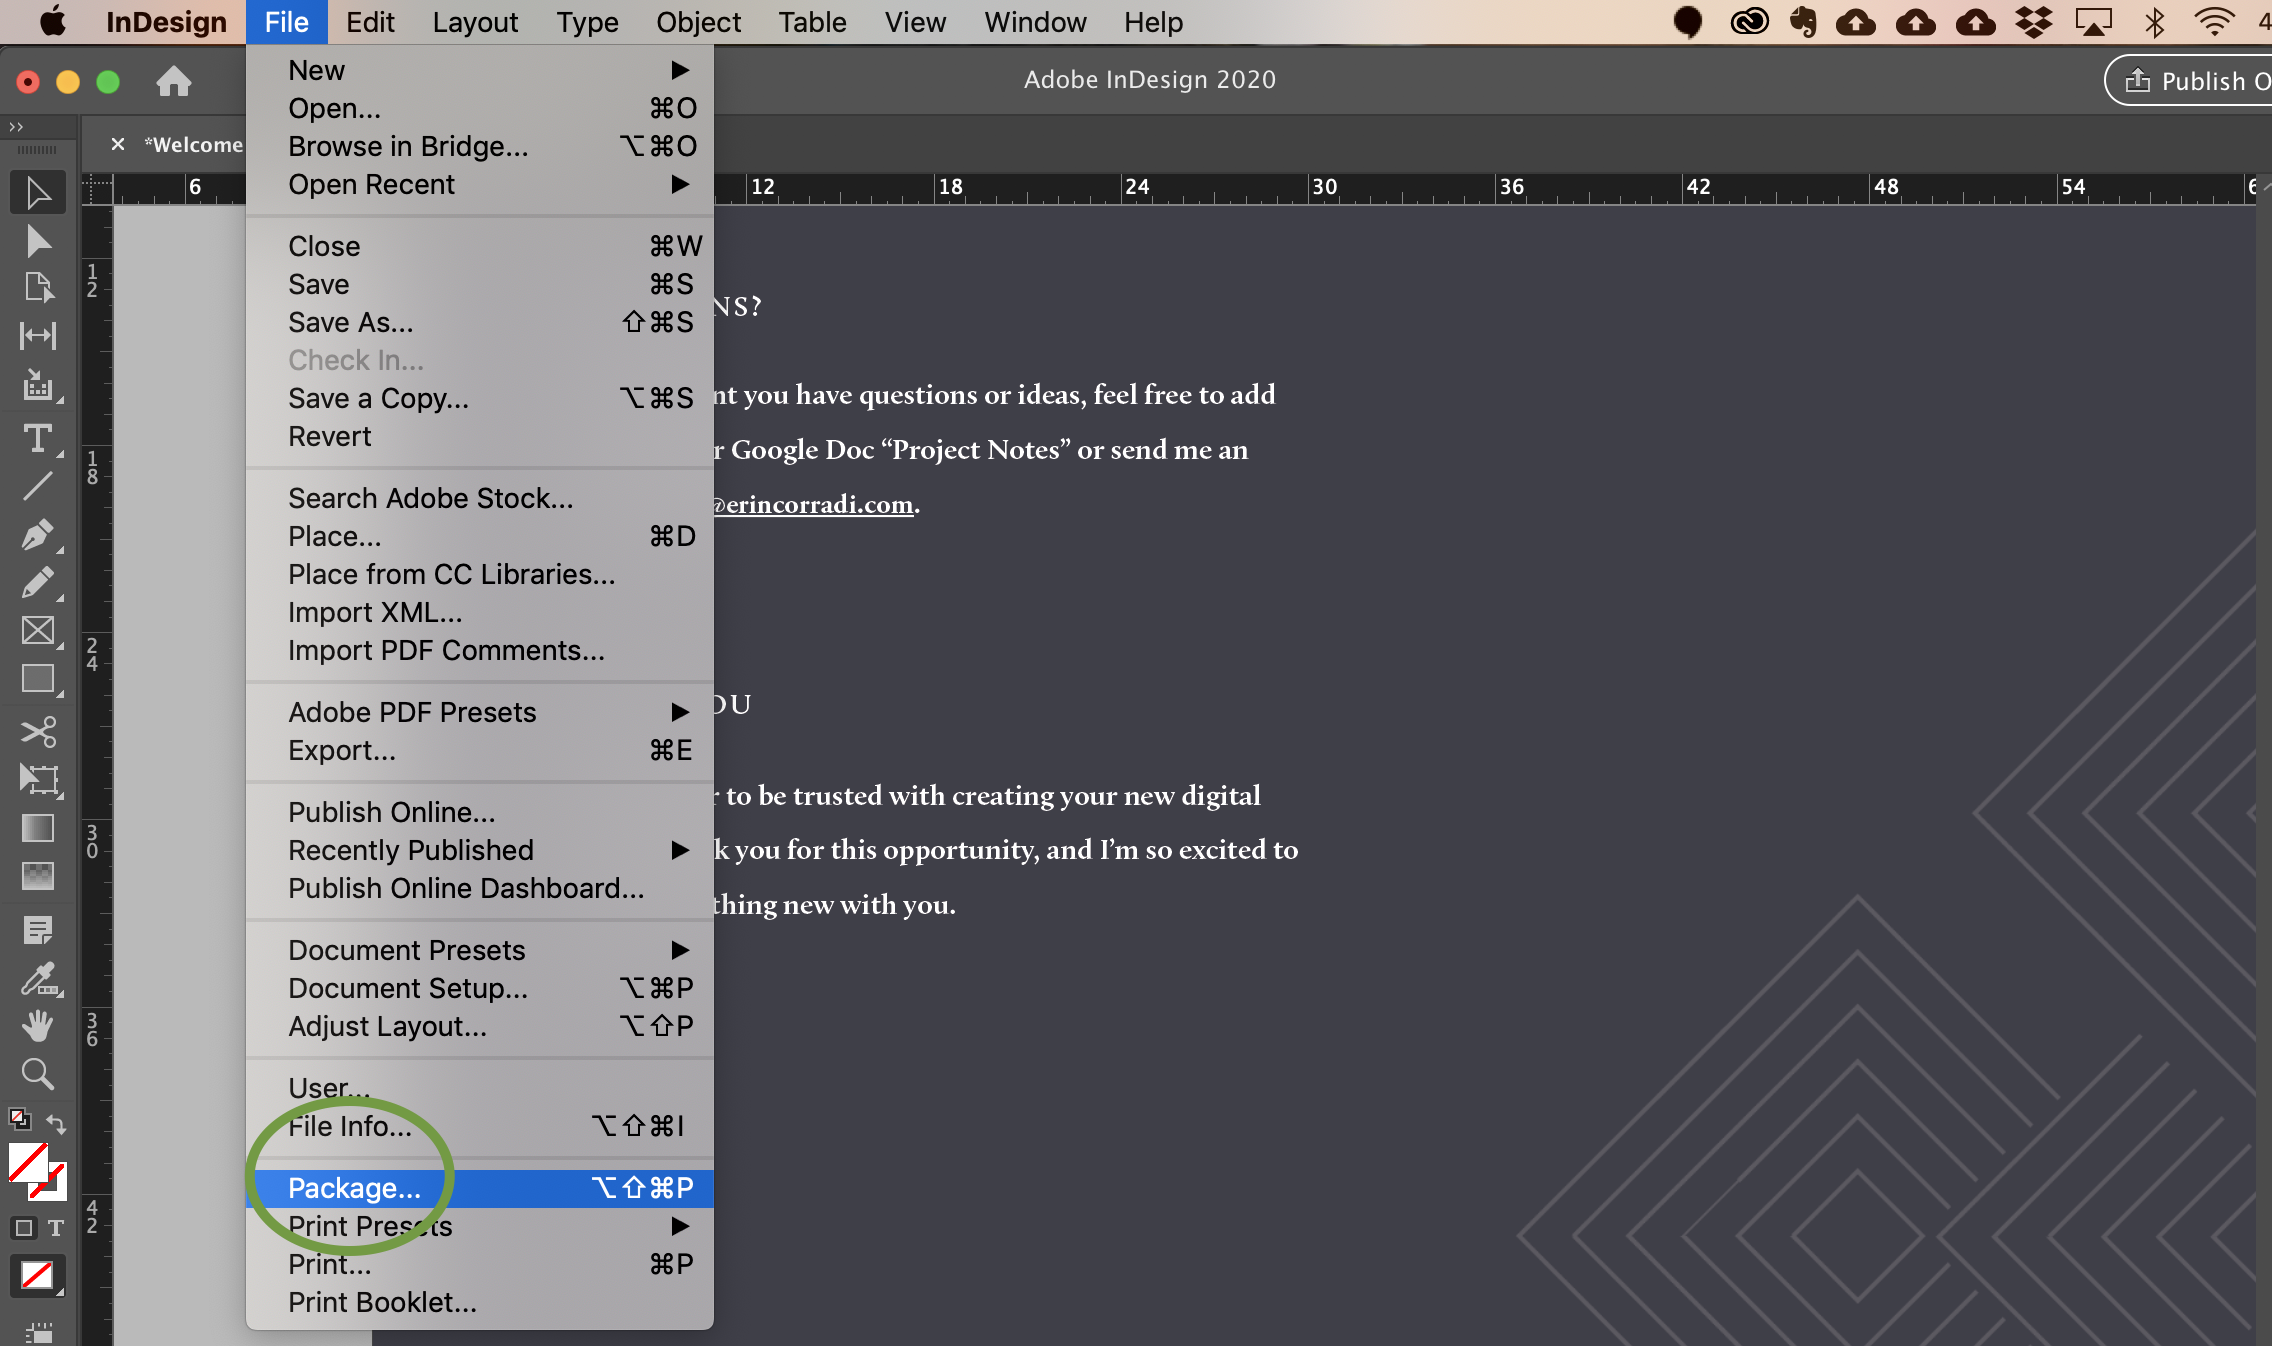
Once the InDesign file is opened and saved, navigate to the “File” menu.
Scroll down and select “Package.”
You can also use keyboard shortcuts:
Mac: ⌥ + ⇧ + ⌘ + P
PC: Alt + ⇧ + Ctrl + P
I find it easier to just go to the menu!
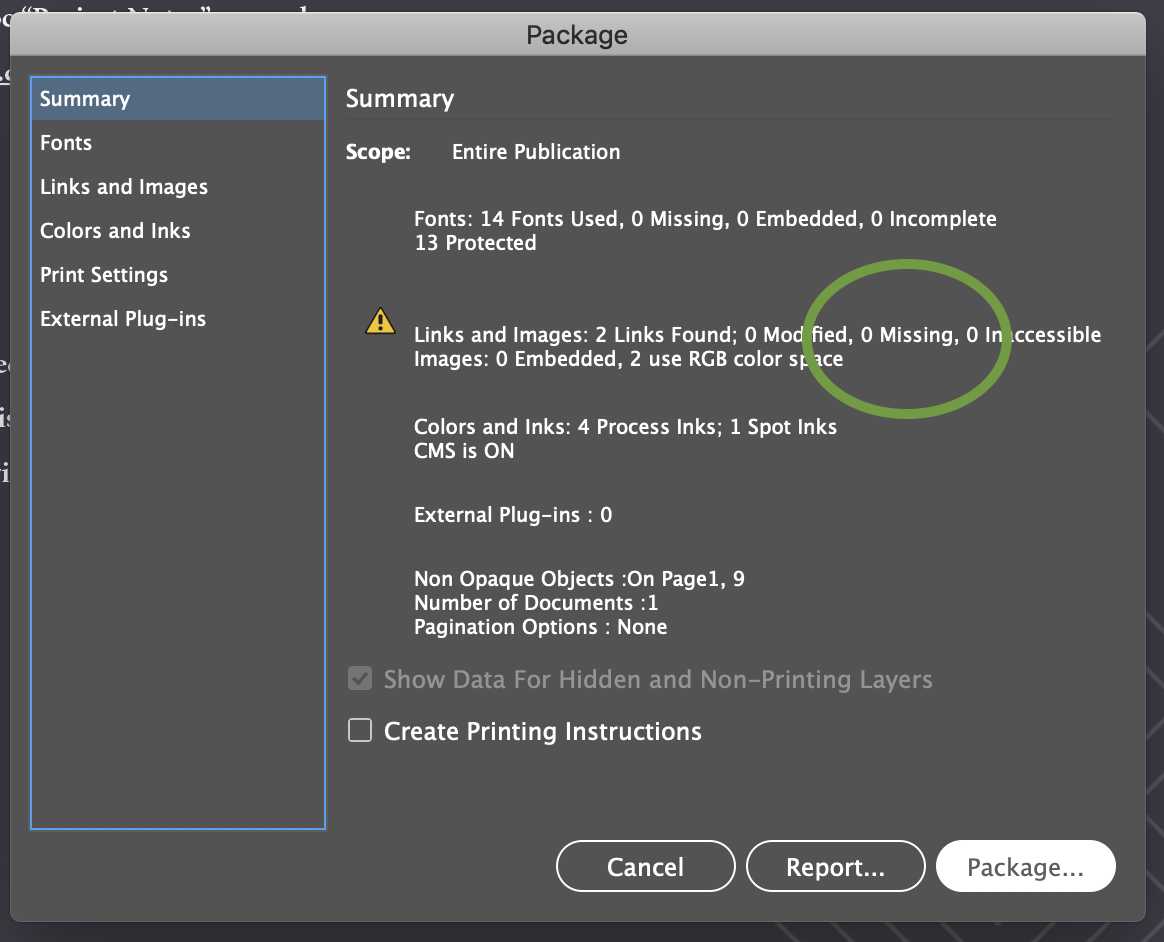
Step Two: MAke sure no linked files are missing.
If your number of missing links is zero, great! You can hit “Package” and move on to the next stage.
If you’ve got missing links, you’ll need to go back to your file and relink them (as in, add them in again like you did originally). Sometimes files get unlinked if the placed file was deleted or moved to a different folder.
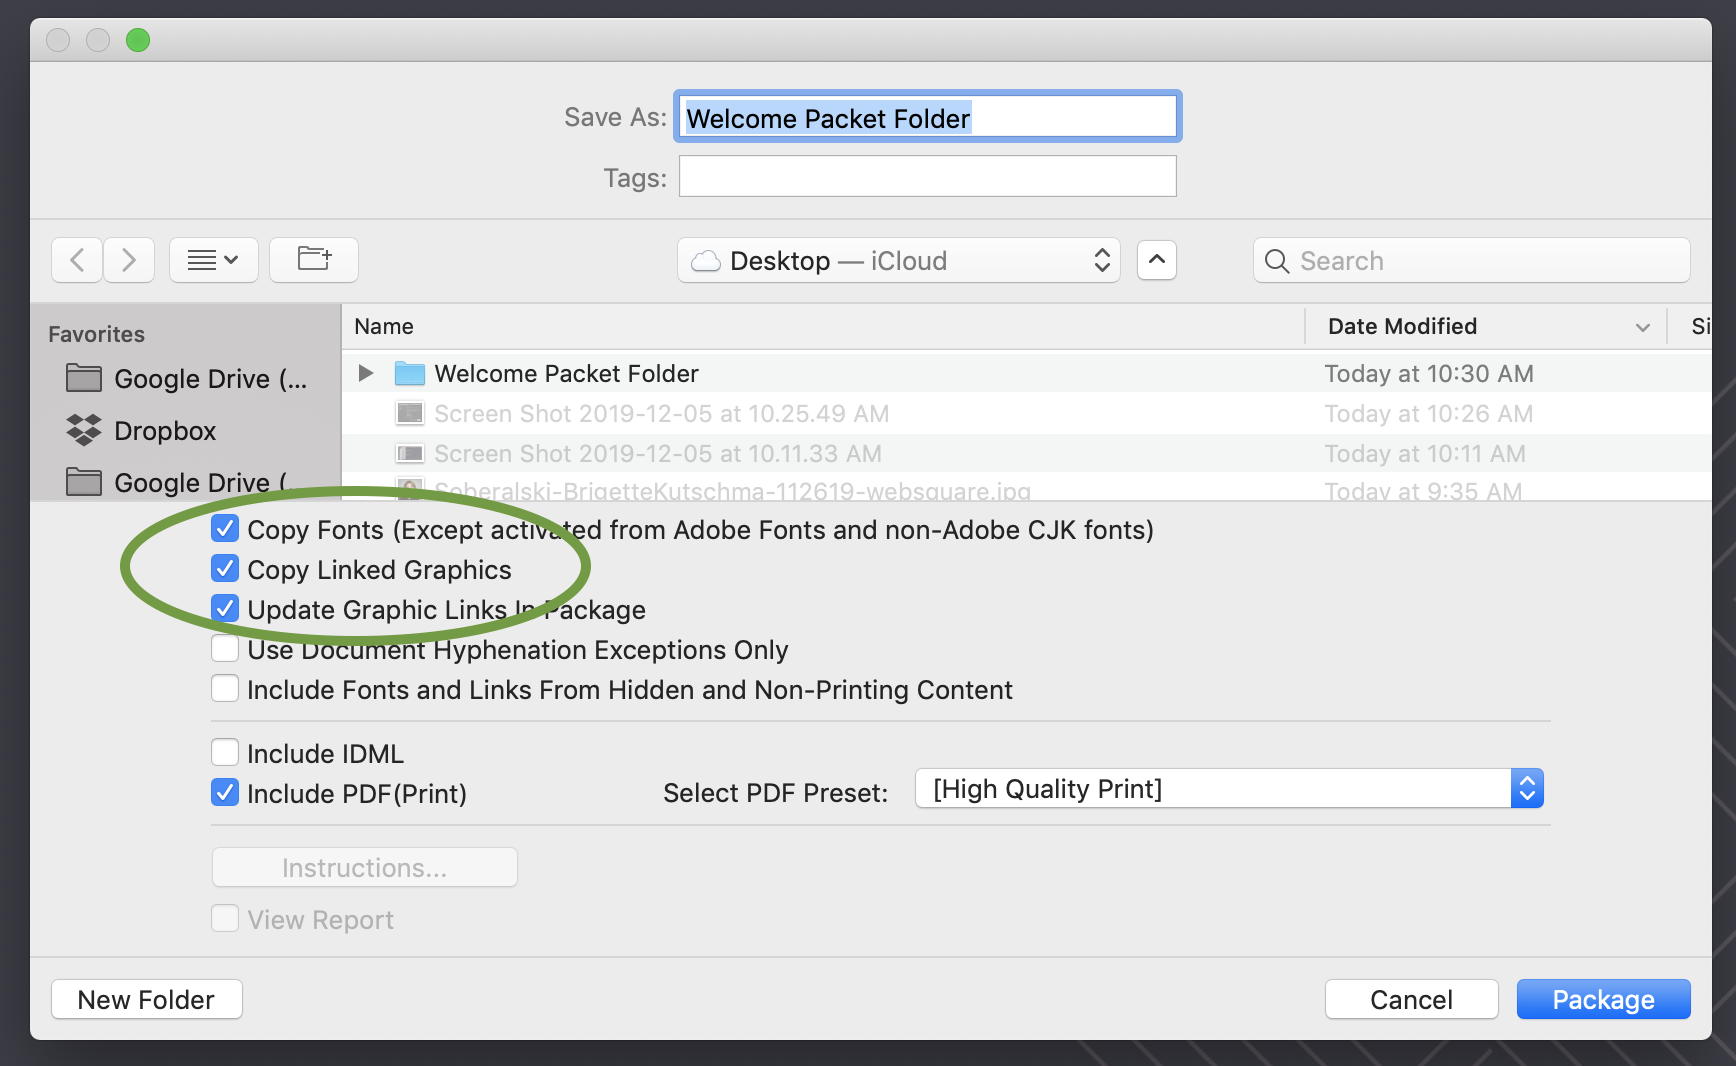
Step Three: include the correct items in your packaged file.
The whole point of this is to give the needed elements to the next collaborator, so the file doesn’t get wonky.
Be sure to include the fonts and linked graphics, as well as to select the “Update Graphic Links”, ensuring that all the links show up when using the file.
Click on “Package”.
Compressing + Sending a Packaged InDesign File
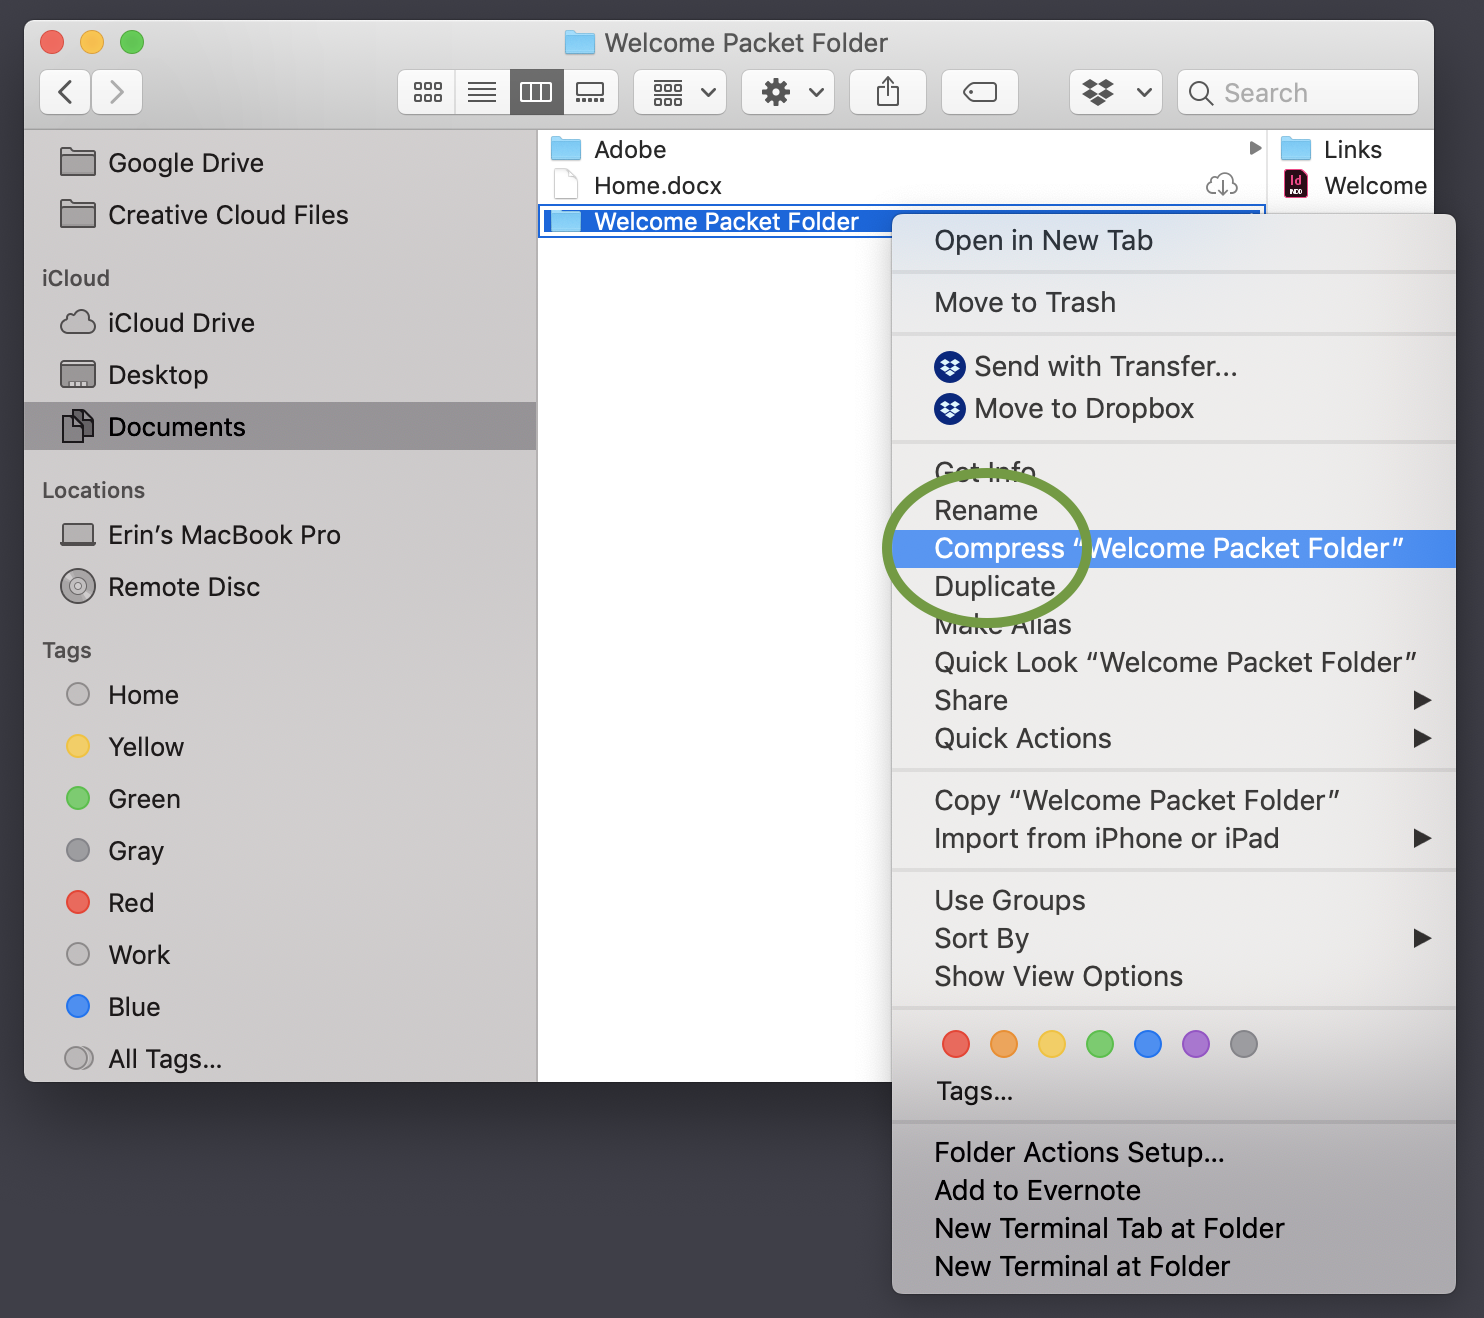
Step One: Find your file and Compress it.
Navigate to where you saved your packaged file. Now CTRL + click (or right click) on the file.
Select “Compress + File Name”.
Voila!

Step two: Upload your file to Email (Or Google Drive in next step).
Depending on the size of your file and the sharing protocol your collaborator has requested, you can just attach your compressed file to an email and send it off.
Gmail limits file size to 25MB. So any file under that, you can attach to an email and send it off. The end.
However, with my clients, I ask them to upload it to our shared Google Drive folder. So, I’ll walk through those steps next.
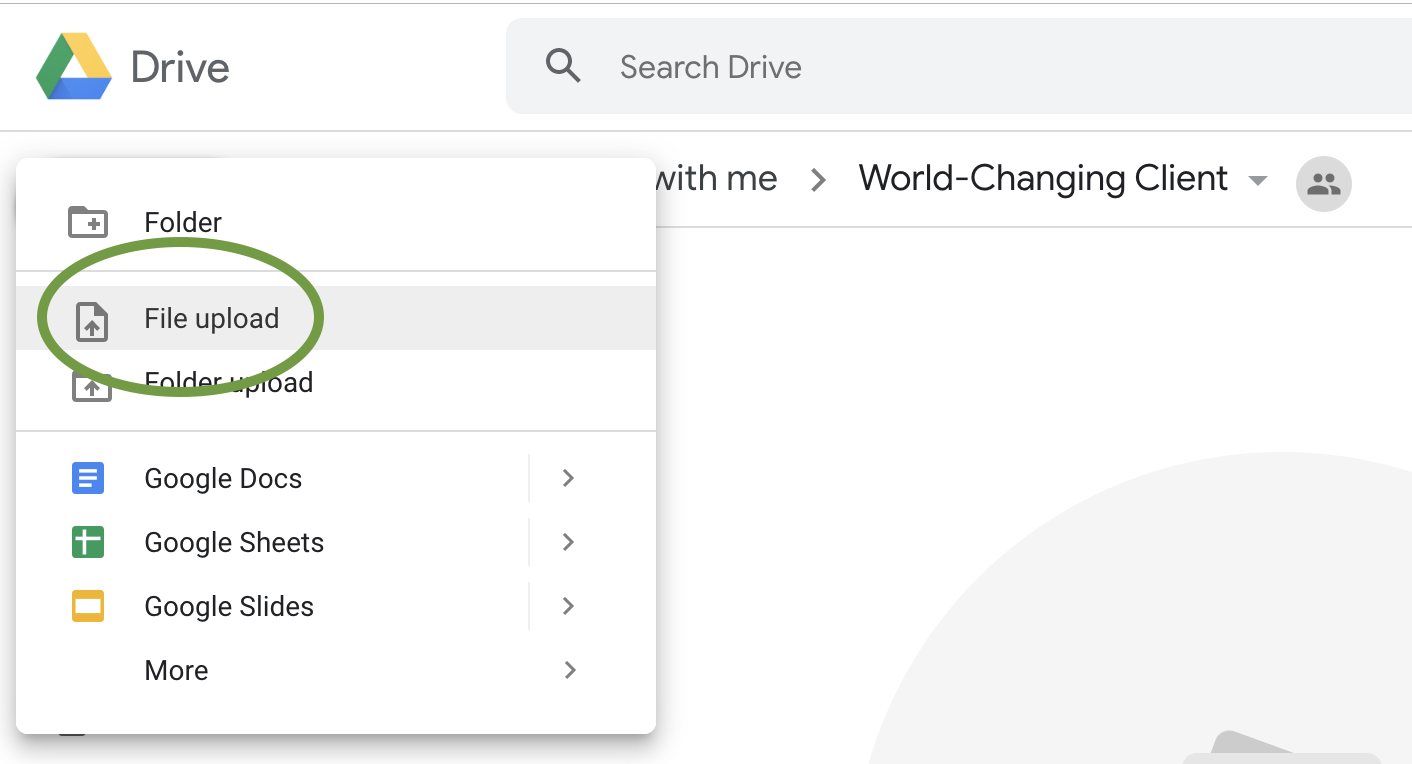
Step three: Upload to Google Drive.
Navigate to the shared Google Drive folder. My clients would have received the link via email. Or you can go to your Google Drive account, select “Shared with Me”, and find the folder there.
Select “New” and “File upload”.
Find your file and click “Open”.

send sharable link to your file
For my clients, the process ends at step three. For everyone else, you still need to get your file to the right person.
Click on the “Get shareable link” icon. Just clicking on that icon will copy the link for you, and you can now paste it into an email and share away. The recipient can download the file and get to work!
Tutorial Request
Tired of Googling and scrolling through forums?
Make a tutorial request and sign up for my email list to get alerts when new how-tos are added.